
Step 1: Open Quotivity Quote Templates
In the Quotivity left navigation, click the Quote Templates tab.
Step 2: Create a New Template
Click New Quote Template. Enter a name for the template and click Create Page.

Note: Quotivity creates a new HubSpot CMS landing page in your portal as the foundation for the template. This may take a few seconds.
Step 3: Review the Quote Preview
Once the page is created, the editor loads with two panes:
- Left/center: a live preview of the rendered quote template.
- Right panel: a list of all Quotivity quote template modules detected on the page.
Hovering over a module in the right panel highlights its location in the preview, making it easy to identify which module you're about to configure.
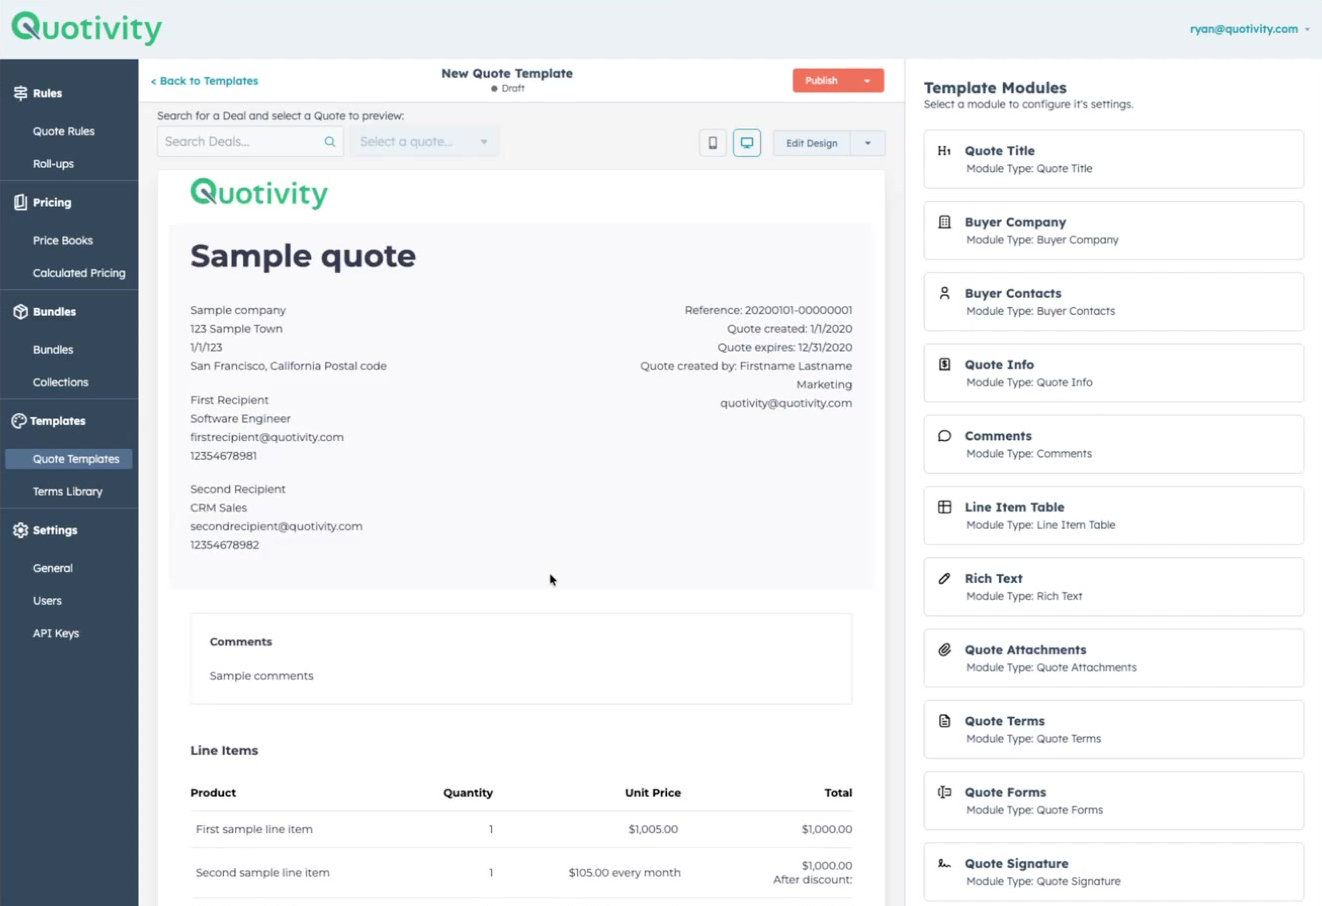
Step 4: Load a Quote for Preview
At the top of the editor, use the search field to find a deal. Select a deal to load its associated quote data into the preview. This lets you see how the template will actually render with real data.
Tip: Choose a deal that is representative of how your customers typically receive quotes. A quote with multiple line items and different product types will give you the most useful preview.
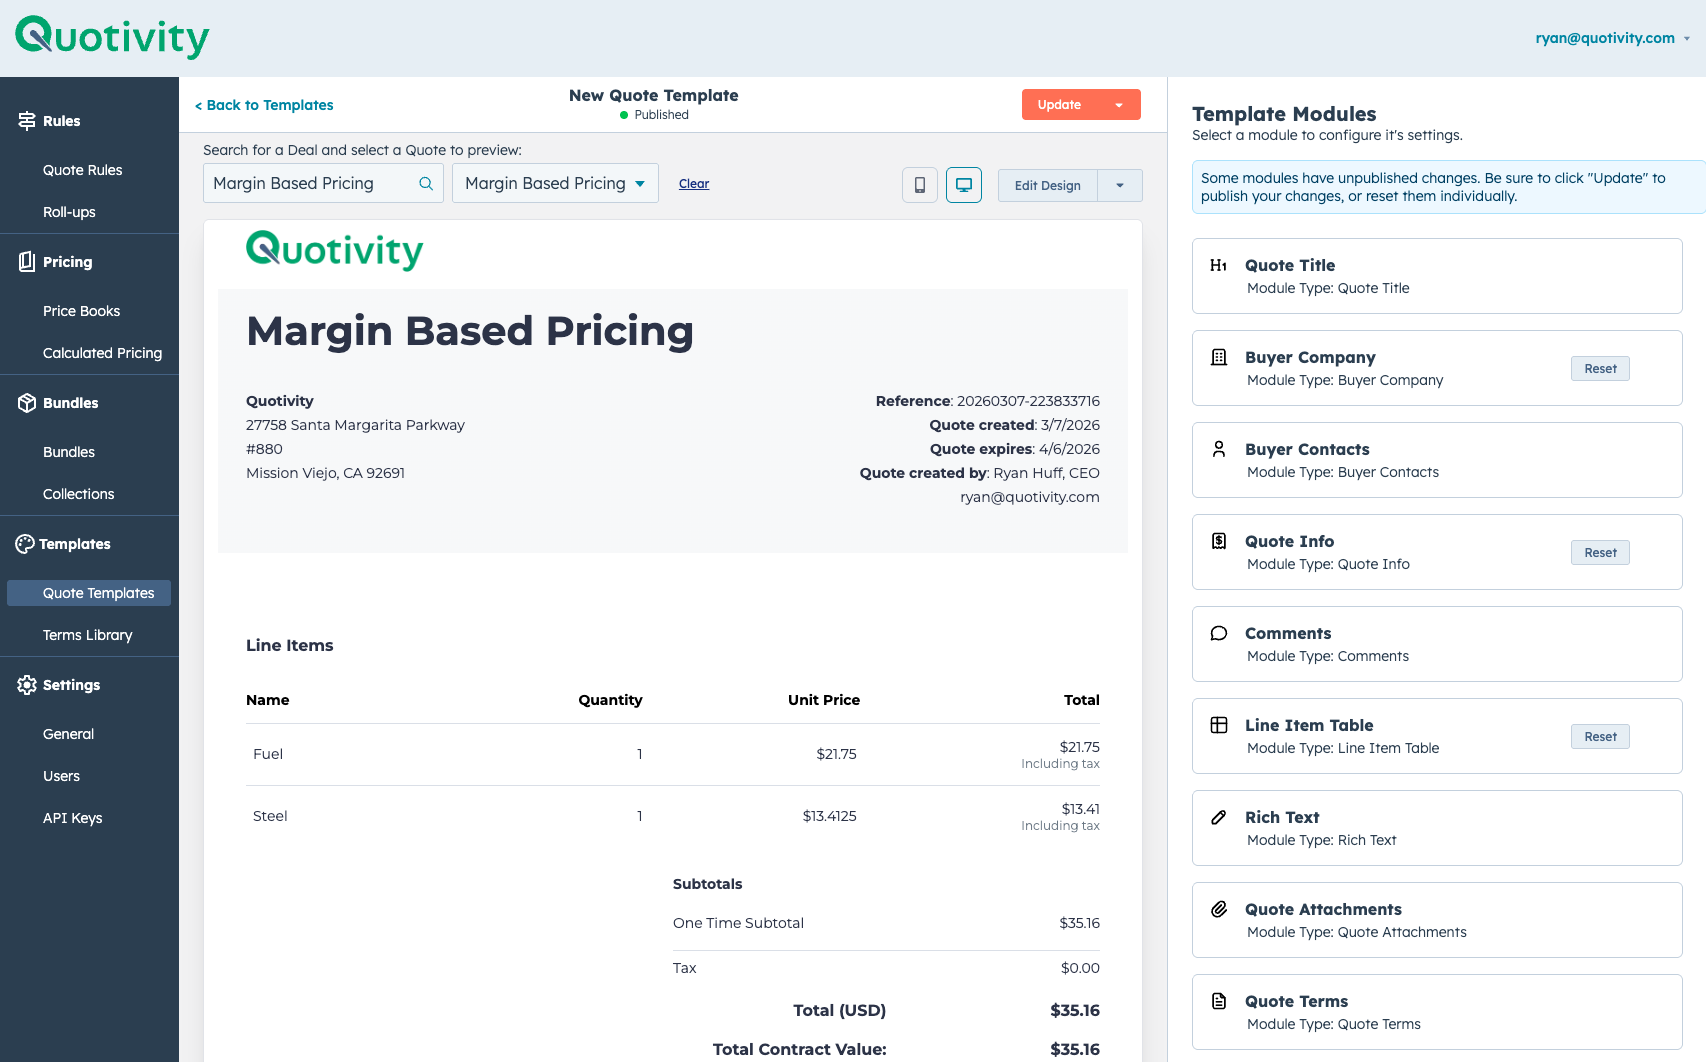
How Quote Templates Work
Before configuring modules, it helps to understand the underlying architecture:
- The quote template is a HubSpot CMS landing page from your portal.
- Quotivity reads the source code of that page and identifies all embedded Quotivity quote template modules.
- Quotivity surfaces those modules in the right panel, shows their locations in the preview, and lets you configure them.
- Configuration is saved in Quotivity and applied at quote render time — you do not need to edit the HubSpot CMS page directly.
Step 5: Configure the Line Items Module
Click on the Line Items module in the right panel (or directly on the highlighted area in the preview). The configuration panel opens with four tabs.
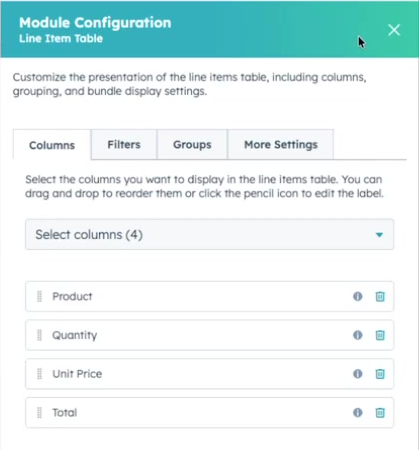
Columns
Choose which columns appear in the line item table. You can:
- Toggle existing columns on or off.
- Add additional columns from available quote line item properties.
- Rename any column so it appears with a custom label in the rendered quote.
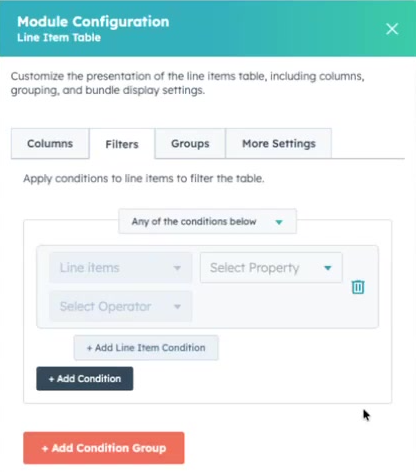
Filters
Add filter conditions to control which line items appear in this particular table instance. This is useful when your quote template includes multiple line item tables — for example, one table for products and a separate table for services.
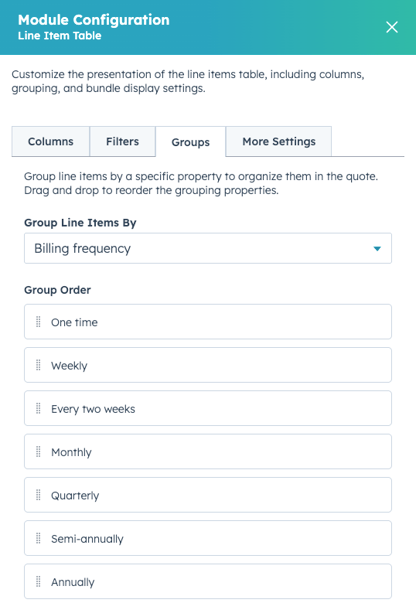
Groups
Select a dropdown property from the quote to group line items within the table. The table remains a single component, but line items are organized into sections based on the selected property value.
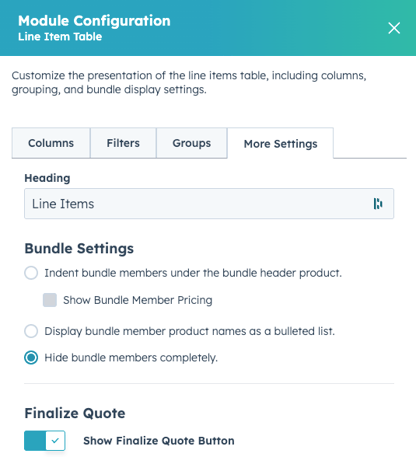
More Settings
Additional options include:
- Customize the section header displayed above the line item table.
- Configure bundle display settings.
- Show or hide the Finalize Quote button (useful when controlling the quoting workflow).
Step 6: Configure Remaining Modules
Repeat the configuration process for each module listed in the right panel. Click each module to open its settings and adjust as needed. The preview updates to reflect your changes.
Step 7: Publish the Template
Once you have finished configuring all modules, click Publish in the template editor. The template is now available in the Quotivity Quote Builder when creating or sending a quote.